Monday, March 14, 2022

Brooks Running Launch 8 Long Term Review

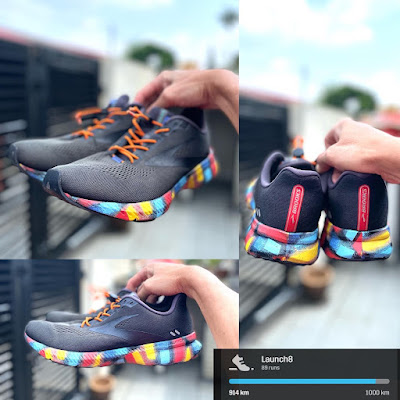
944km, 89 runs. Many Run Happy moments

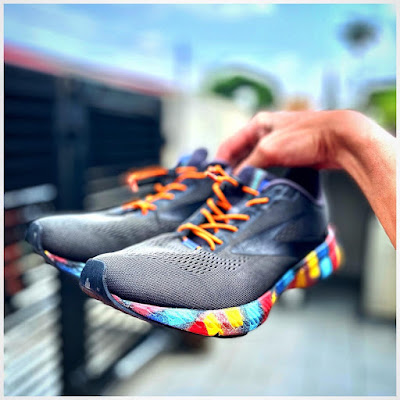
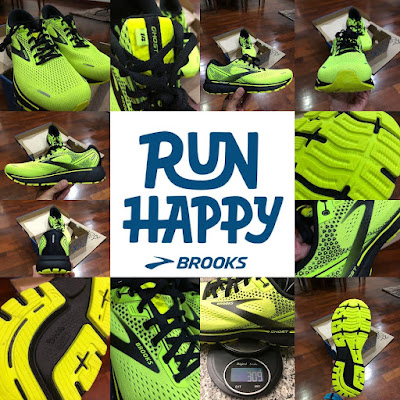
This is a long term review of the Brooks Running Launch 8. I've ran in this pair since November 2020 post my birthday and has surpassed a solid 900km mileage. This was my first pair of Brooks after a long time. The Launch 8 is a pair of simple, fast responsive trainer, lightweight and unassuming. Some say it's vanilla and no surprises. I dare to say affordable pair of trainer has exceeded my expectations.

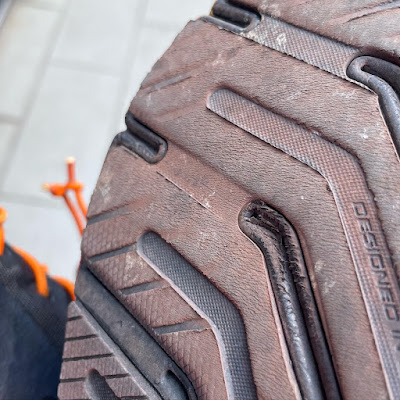
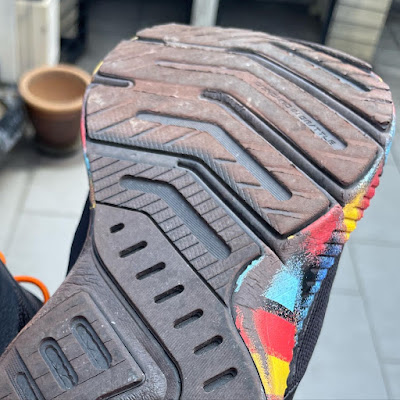
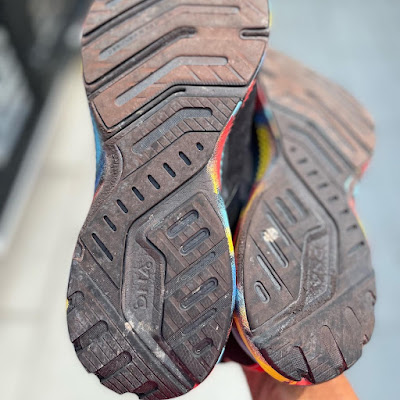
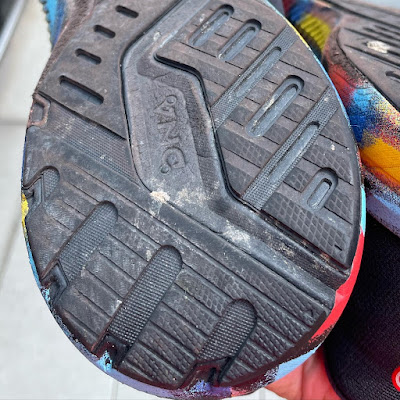
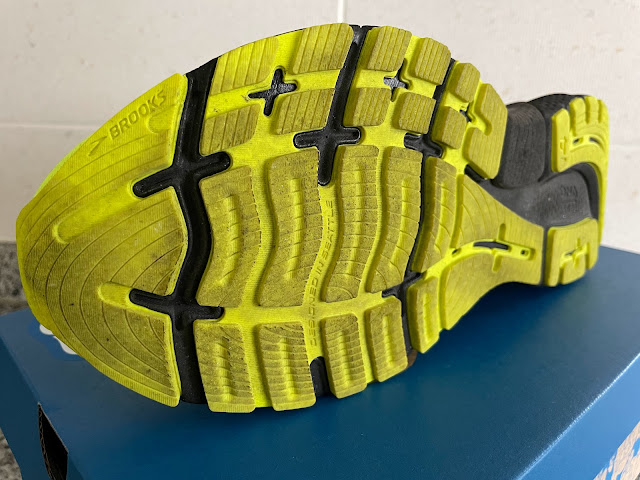
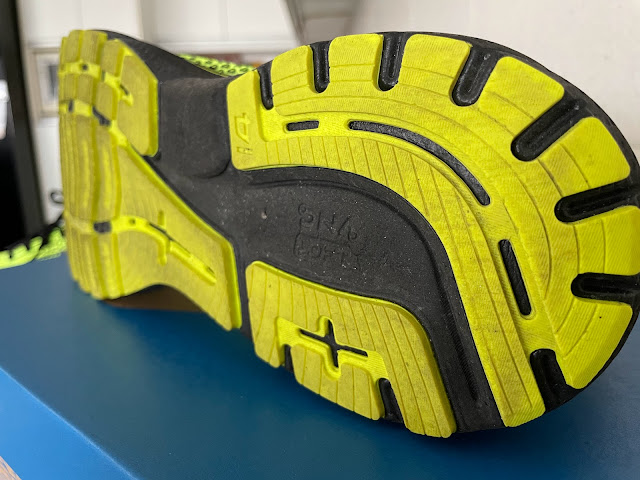
Just look at the condition of the sole after 900km, compared to when it’s new in the photo below - this shoe will last at least another 300km easily and perhaps even more. Not sure if it’s a good sign or good thing as that meant I can’t request for a new pair of shoes as I have not worn this out yet. I saw what you are doing Brooks Malaysia! 😉

Heavier wear on my left forefoot due to my running gait

reasonable wear on the midfoot

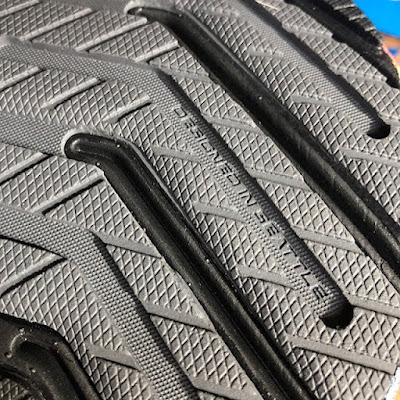
The DNA sole retained it's elasticity and provide the support required

Minimal wear on my heel area

Here is the sole new on Day 1

New 0km mileage

And here it is, at KM900!

If you have not read my Launch8 review, head over to this unboxing and review : LAUNCH 8❤️

If you want to get yourself one, use EEVANOFF25 at BrooksRunning.com.my for up to 25% off all items, or use code SPEV02 at SportsParagon.com for even more discount and selections of all brands under @sportsparagon.official brands. Free delivery applies, best way to shop while staying safe in the Covid situation we still in.

Impressed with the Launch8? I know I am. :D

Tuesday, March 01, 2022

Brooks Running : Ghost 14 Unboxing and Review

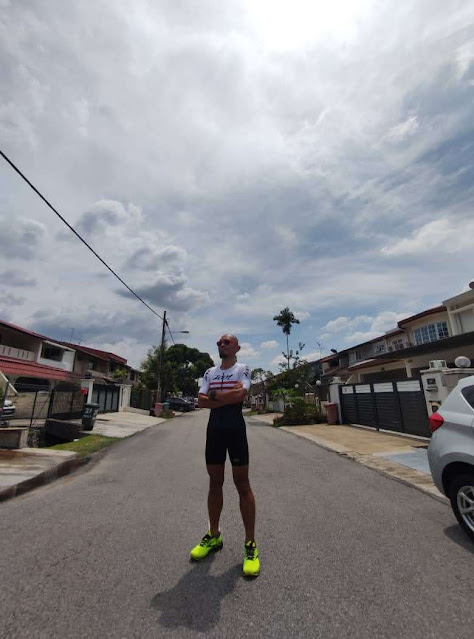
"Ee-Van, if you are coming to the Sports Paragon Warehouse Sale, let me know. I will pass you your entitlement as part of the sponsorship", said the Athlete liaison which is also the Paragon Vests Marketing manager. I intended to go to grab a few shoes for the family, and looked like I don't need to get any for myself. Long story short, i received a Brooks Running shoe, a Zoot sleeved Triathlon top, a set of Prime Sports wear and a Brooks retro cap. Thank you Sports Paragon!

Woohoo! See below for discount codes

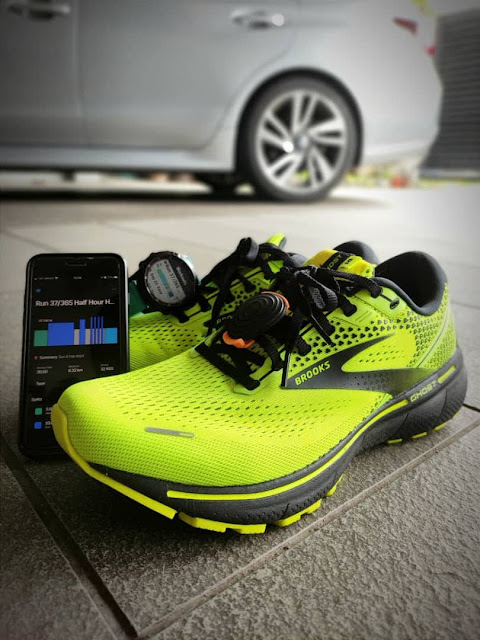
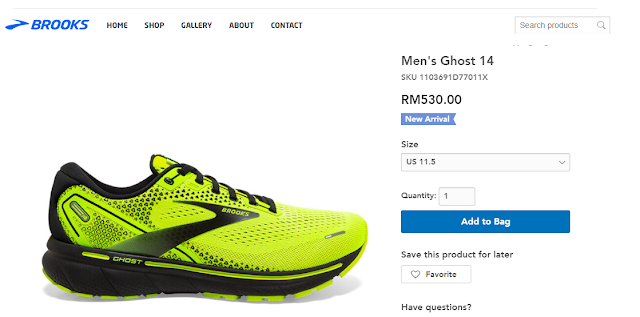
The Brooks shoe I first received was a YET TO BE LAUNCHED limited edition Ghost 14 colorway (I took a pic but has promised not to share...) which will remain a mystery for you my dearest readers here. A quick communication the same day, I realized that Ghost14 was given wrongly. Not launched yet. Can't be seen outside. So, i get a replacement Ghost14 in Nightlife colorway. A brighter than bright yellow neon floro-blast Ghost14.

A quick round up. Details, below.

The Brooks Launch8 has been my mainstay and as I write this, covered close to 700km since November 2021 - pretty decent mileage taking into consideration that I have been rotating the Launch8 with this Ghost14, covering about 150KM in the past 20days of ownership. 

Which makes this write up possible and to provide a fair view of the shoe. 

First off, let me reshare the "Decision Tree" below, which I find it useful and accurate to help some of you dear readers decide and finetune your choices with shoes.


Based on my running gait, I know I am neutral footed and do not need any support. I would had love to get SPEED but the shoe provided to review is a CUSHIONED. And it isn't bad as the Launch8 is already (technically) a "speed" shoe, just not "super fast" like the Hyperion range. Ghost14 lands nicely in the Neutral-Cushioned-Balanced box. Which is expected based on my past experiences running in Ghost3 and Ghost5 - that was a good 9 to 11 years ago! It would be interesting to see what has changed. In another word, this is a step change in my experience.

Unboxing
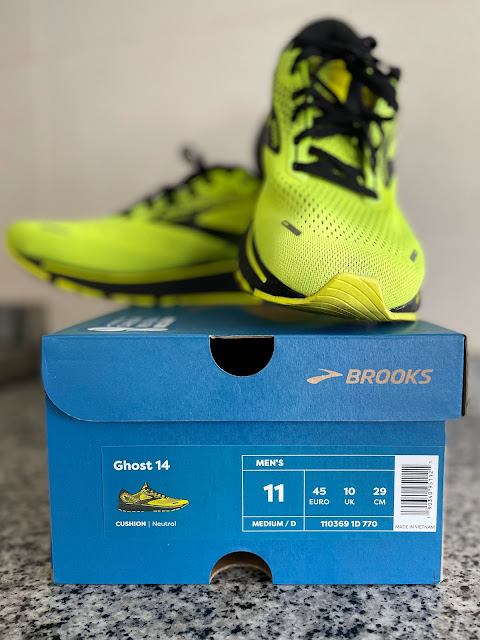
US11 in D-width. Gambled with this sizing as it's same for my Launch8 which was a good fit. 

Official weight as per Brooks for a US9 male sizing is 280grams and my pair of US11 runs into 309grams. Not the lightest but expected of a cushioned shoe. Compared to the lighter Launch8, it is about  40grams heavier only - not a biggie for the extra comfort on longer runs.
Decent for a cushioned shoe

Brooks Ghost14 continue with the BioMoGo foams which will break down faster in anaerobic condition in landfill. Upgrade from all the Ghost I knew of is the DNA LOFT. Brooks DNA is presence of the cushioning gel in the midsole. This DNA gel is adaptive to the force applied. A higher force will make it firmer. This meant the cushioning is able to adapt to be firmer for a heavier user, and yet become more responsive when the pace picks up. 
DNA Loft yo!

The Ghost14 comes with DNA Loft and BioMoGo DNA. DNA Loft is the softest, plushiest midsole produced by Brooks. A mixture of EVA foam, Rubber and Air. Yes, Air gets injected into the full midsole to provide that cushioning effect while provided with durability of rubber. The DNA loft offers a very stable, lasting ride for as long as the shoe is in service for you. Having only experience DNA (most basic) in Launch8, I dare to say the differences is felt in terms of cushioning while still feeling that snappy transition at take off in faster paced workout.
Convincing Plushness

A full outsole was seen in Ghost14. This meant that it is covered from front to back. Blown rubber at the front and harder carbon black material at the heel ensure durability and mileage. The softer blown rubber outsole helps provide extra cushioning - not that Ghost14 needed it due to the higher stack present.
Designed in Seattle - the Brooks HQ

Ghost14 has a high drop of 12mm. I felt "tall" wearing it and a check showed it is a 31-19 (Heel-Toe) stack. This must be the highest drop shoe I have experienced in the past 7 years. Strangely, it sort of settled in after a run or two and I did not felt clumsy after. 

The socksliner is made from EVA foam and it adds extra plushness to the overall ride. Another feature that wasn't really made known is that the shoe upper is 3D printed and stretches to suit your movement. 
3D printed upper, flexs and stretch for a more accommodating fit

The heel cup is well placed and i had no heel slip when running in wet weather or in speedwork. It secure the heel rather nicely. The heel cup is well lined, with intend to prevent blisters. I have however, one formed, which is by my own fault as I did not secure the laces down correctly/firmly. Small blisters that doesn't bother me after a day.

3D printed as well

Continuing on, the tongue is not gusseted or in layman term, secured at all sides. It is a floater. Personal preferences as I noticed most Brooks are not gusseted. Actually, many of my shoes aren't as well. The Ghost14 tongue is padded and offer a lot of comfort if you are the type that likes them snug on the upper feet. I had to adjust the tension of my lace a few times to get that right feel - I guess a transition to using stretch lacing/speed lacing aka using rubber garter is in the plan.

The laces are flat, and it doesn't come with an spare lace of a different color. Black on Yellow Nightlife, flat laces is basic. It works. On a padded shoe, you have to find the right tension. 

The upper mesh provides good ventilation. I do not felt hot wearing them while running under the hot sun with hot tarred road. It doesn't felt "airier" than Launch8, which is already pretty well ventilated. So, I take that Brooks has pretty much dialled in on their material on the upper. As I run sockless, there wasn't any issues so far with hotspot. 
Sockless for the win!

The last feature i tested before going for the run was how flexible and pliable the shoe is. Because of the bulk, the shoe has expectedly takes a bit more effort to bend it. Wearing them on a run doesn't makes me felt any different as compared to Launch8 because my feet doesnt bend 90degree at the toes relative to the metatarsal. What I look out for was if there are any indication of "bite" at where the feet bend on a normal running transition. None. So that is good news. 

Orange laces? Yes? No?

First Feel 
The lacing need a bit of adjustment due to the thicker tongue padding. When dialed in right, it was good and it secured my feet very nicely. I have normal arch and a mid-to-heel over pronation. 

The shoe really shines!
The Medium width (D) felt great on my feet. My toes can splay out comfortably without having the  small toes pressing out the side. However, At one point during the run, I was wondering if i should had taken half size bigger. Its just some niggling feeling if half bigger could be better? Not sure, maybe in the next entitlement I may ask for a size change from Paragon Vests.

...and The Story So Far, 150km in...
The Ghost14 performed as it should. Providing good cushioning and yet sufficient "feel" for those fast workout. The weight doesn't bother me once I get the legs moving. If any, I treat the extra as part of training. As I am hardly a podium or record breaker, the shoe suits my easier workout day. Those days where runs are easy and help to build the base. It is truly a mileage eater as I could run in this whole day long. OK. Not that I ran further than 42km in the past 3 years anyway. You get my drift. 
Almost no sign of wear on the forefoot

You will notice that the outsole has no significant wear shown despite running the past 150km I did. The only thing is that I lost the bright yellow color of the sole due to tarmac stain. Perhaps, another 500km may show some sort of significant wear, and that would take perhaps another 2-months plus for another reporting.

Brand newish otherwise dirty due to tarmac stain

The shoe upper after 150km still looked new. The color did not fade, or doesn't appear to be despite me sunning it every run. UV rays may had lessen it a bit in terms of brightness, but it doesn't appear to be so.

Pros
  • Cushioned and responsive. Forefoot felt sure and has snap in the take off.
  • You feel grounded despite the 12mm drop. Strange feeling for me.
  • Fit is nice. Just need to find the sweet spot with the lacing pressure
  • No blisters despite running sockless. Only one time because I was finding the lacing sweetspot.
  • No heel slips despite all drenched in rain and sweat on two occasions.
Cons
  • Similar to Launch8, not wet weather grip friendly. Two experiences in rain showed a lot of slips even on tar/asphalt road. It impacted power transfer slightly due to split second grip-slips.
Not-Really-A-Con-But-It-Is-Just-Me
  • Heavier than all the other shoes I have. OK. Maybe I should stop being a gram-granny
The Ghost14 lives up to it's promises and looked promising that it will have a lifespan of no less than 1,000km or about 5-months of wear for me. Based on the 700km Launch8 which has thinner midsole and outsole, I won't be surprised this will last beyond 1,000km as a useful trainer. This pair will rotate with my Launch8, and hopefully, a faster Hyperion Tempo or Elite2 (lets manifest this Carbon shoe together gether with me) will replace the Launch8, and this Ghost14 will be a full on easy-day shoe.

A YES for me

And... A Carbon Neutral Shoe?
The Ghost 14 is Brooks Running first carbon neutral shoe. Through Brooks ‘Climate Action’ program, they are committed to first reducing emissions and then offsetting the rest. It’s one more stride toward net zero carbon emissions by 2040. 

Sustainability agenda in Seattle HQ

Brooks achieve this with usage of more recycled materials. The Brooks Ghost14 shoe lace, as an example is made from 100% recycled polyster. Much of the upper is also from recycled polyster with minimum content of 33% and most parts are 100%. Then there is the Carbon Offset program that Brooks subscribed to, as part of their sustainability agenda. I say this is truly a pair of Run Happy and Run To Love Mother Earth effort. If you are interested, read more here as Brooks share their initiatives.

https://www.brooksrunning.com/en_us/blog/gear-stories/ghost-14-carbon-neutral.html

This pair of Brooks Ghost14 in Nightlife Colorway is courtesy of Brooks Malaysia and Sports Paragon. Retail price is RM530.00. There is no carbon plate in this pair, and user should not compare this against performance shoes specifically designed for speed. Ghost14 is your mileage eater and it sits nicely as your daily easy trainer and your go-to speed shoe on rotation. 

Discount??? You Want Cheap?
As part of my sponsorship with Paragon Vests under the Team Sports Paragon, I have a few discount codes you can use to purchase your next Brooks shoes if you want. Older models at higher discount is available in www.sportsparagon.com website. Sizing can be a challenge, which explained the better discount. If you want newer and better sizing, head over to www.brooksrunning.com.my and score a few newer models.

Fancy this at 25% off?

More details at this announcement page where I have the full discount codes and brands that support me in 2022. But if you are lazy to click, here they are...

Promo Code: SPEV02
Footwear: 55%
Apparels: 50%
Sandals: 40%
Accessories: 50%

Promo Code: EEVANOFF25
25% OFF of all items ( exclude sale items )

Promo Code: ZOOTEEVAN20
20% OFF Zoot website Non promo items
10% OFF Zoot website Promotion items


I will be using these hashtags a lot in my social media postings, so that will allow for easier references with like-minded individual that contribute to the community. 

#sportsparagon #Swim #Bike #Run #triathlon #zootsportsmy #brooksrunningmy #primesportsmy #sportsparagonmy #keepshowingup #runhappymy #AllWeatherRunner #keepshowingup #runhappymy #AllWeatherRunner #getfitwithsportsparagon #GarminMalaysia #BeatYesterdayMY #StrydMalaysia #RunningWithPowerMY

I will continue my sharing in my social media spaces here in Instagram, Facebook Page, YouTube channel Twitter and Garmin as I engage all of you as the Key Opinion Leader (KOL).

Tuesday, January 25, 2022

Garmin Power Meter Battery Change - Vector 3S

Hope the Vector 2S battery change and tips was helpful. If you missed the article, it's here in details. For Vector 3S, the process is very similar. Vector 3S was launched in 2017, and I've been using it on my main triathlon bike since. While the newer unit does has it's advantage, Vector 3S is not without some issues. The most common issue is power spike and battery drain. There were one recall for this unit which involved the design of the battery door. Older/first generation has issues of water seeping through, which then rusted the AG13 battery inside, rendering them failing to work. Garmin has exchanged these doors for everyone that had that issue. Since then, they also came out with a solution to help with the power spikes. I will share them here today.

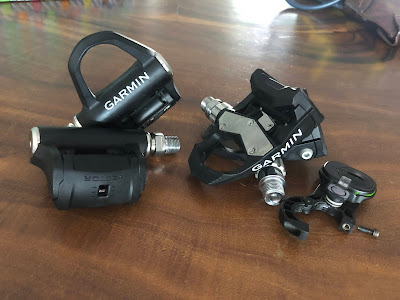
Vector 3S on left. Vector 2S on right, with the external sensor unit
As you can see, Vector 3S has the power sensor built into the spindle itself. This reduces external unit found on 2S. it offered a cleaner setup, almost giving the impression it's just another (Exustar) pedal. They both share similar cleat. However those of you that may have two bikes and one power meter, with the other bike.
Changing Battery On Vector 3S
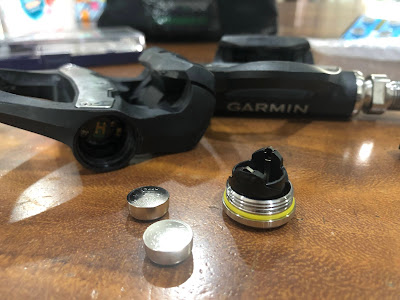
Vector 3s uses two small button sized AG13 or LR44 batteries. To open the battery case, a small 4mm hex key. The batteries will fall off easily as it's not secured, so please make sure you are in an area where the replacement battery won't fall or drop somewhere you can't retrieve.
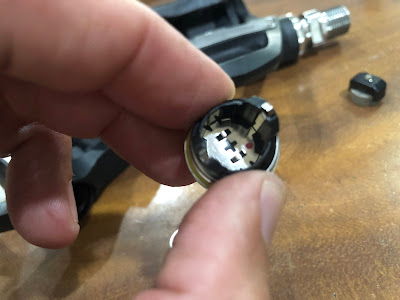
The two LR44/AG13 batteries, and the battery door, removed using a 4mm hex key

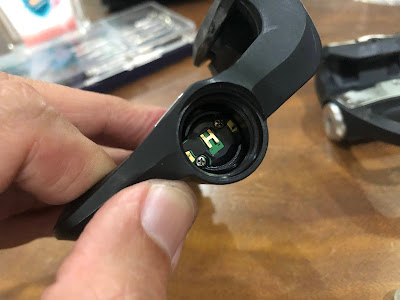
Similarly, clean all electronic contact with the alcohol solution and let it dry. don't be surprised if the contact looked dirty on your tissue paper or the cotton swab. Vector 3S is known to have these due to the circular turn of the spindle against the battery door.
Clean. Wipe. Dry.

Clean this as well. The + shows the positive battery orientation
Once you are done with this. Put a drop of mineral oil on the battery contact. This will provide a layer of lubrication for the batteries to spin/turn in the spindle. 
A drop and just dab off the excess.
Do the same on the second battery on both ends and then carefully put it back in and secure by locking with 4mm hex key. Once done, install the pedal - Drive side clockwise, non-drive side, counter-clockwise. Hand tighten, and then lock in with 1/8 turn. Good to go.
Next: Calibration
Straight forward as the Vector 3S is my main power meter. Connect the unit to your Garmin device, and scroll to Calibration page. Two presses and you are done.

Hope this is helpful, and continue to prepare you for the 2022 season. See you on the race course (and training of course!)

Tuesday, January 18, 2022

Garmin Power Meter Battery Change - Vector 2S

Vector 2S is a rather old model that still does it's job really well. It was first launched by Garmin in 2016. I've been using it for years, and it has helped provide the power data on my rides and races. The Vector 2s has been discontinued by Garmin. There are a lot of used and reconditioned unit out there that you can purchase for a bargain. Just make sure you find one that is still ok physically - as that is the first tell tale sign if the previous owner abused the unit and the chances of the mechanism integrity is strong (aka working) is there.

  • Click Here for My review of Vector 2S

Maintenance is simple, almost no frill. A single CR2032 button cell battery last a long time, and i periodically change it only when the LED blinks red, or before a major race. Due to it's age, my unit sensor sort of detached from the casing that holds it. The glue on the inside that held the casing to the sensor unit (waterproof) dried up. It was an opportune time for me to remove the pedal, and reinstall it on my more frequently used bike, while transferring the Vector 3S to my main triathlon bike. I consider this activity I did today as "getting ready for the 2022 season".

Main unit detached from the case.
The fix for the detached unit is simple. While any glue will be sufficient, I skipped the contact adhesive (rubber glue), and superglue. Using silicon glue provide better adhesion and less issues due to heat. Silicon glue has lower possibility of getting dry and brittle. Also, superglue has solvents, which may eat into the plastic of the units. Silicon glue is not as acidic/caustic as superglue.


Simple fix. Instead of using rubber or superglue, use silicon glue as it has better adhesion and typically last longer

A small amount will do. I chose the same spot as the original adhesive was. After cleaning the casing and removing as much of the old (dried, and brittled) adhesive, the unit is ready to be place/secured back again.
I use what I have at home, in this case, Silicon glue is my main go to
A firm press on the case and sensor unit, and I am ready to go. 
Next: Changing the Battery
The Vector 2S runs on a single CR2032 battery. Same battery on the Garmin HRM. You can get them cheap from Ikea or from Mr. DIY. Keep a strip of them handy, you never know when you need them. First off, open the casing using a coin or a screw driver. I personally prefer a coin as it gives firmer leverage without damaging the battery door. Once you open it, you see the battery. I like to use a magnet (in this case, my old speed sensor magnet) to "pull" the battery out. Almost no effort. Better than trying to pry them out and risk damaging more parts.
Next, you need to clean all the metal contacts. I like to use alcohol swab. It removes any oil or grease. With Covid19 around the last 2-years, alcohol based cleaner is easy to get. I just press a little onto a tissue, and rub all the contact gently. You do not want to break anything.
Small amount, wipe and dry

metal part on the cover, wipe

metal part in the sensor, wipe

metal contact in the pedal spindle, wipe

metal contact in the sensor attachment to spindle, wipe
Once this is done, you can put the CR2032 into the sensor unit and lock it back using the same coin. The unit LED should start blinking (anything but red). If it blinks RED, you need to change the battery again. Bear in mind that these button cells has shelf life too.
All still working well! Yes!
Next is to prepare the spindle. Some grease will always be good, to prevent any seizure/hard bonding when installed to the pedal. It is always a good practice. I have some lithium grease from my last headset installation and used just a little to line across the thread.
A little goes a long way
One of the last thing to do, before reinstalling, is to put a little bit of mineral oil (i use the light sewing machine oil) onto the spindle contact. Why? This is the part that will be in contact with the sensor unit. Putting some mineral oil (it's conductive to electronic current) will help to make the internal movement  between the spindle contact where all the power generated will be transferred to the sensor unit. This also prevent any potential power spikes when you use the unit. 
A drop, and then you just dab off some access. leave a thin film on the surface
Installation and Calibration
With this done, you can install the pedal. Remember that on the drive-side aka the crank side, you tighten clockwise like usual convention. On the non-drive side aka the left side, it is the other way around. Hand tighten both pedal and do not over tighten (typical guidance is to just hand tighten, and then give it another 1/8 turn to tightness. Once done, switch on your Garmin device, to setup the pedal and to calibrate it. Follow the on-screen instruction and you are done.
Usually happen when linking new devices. Good thing to do as it reset and restart the process for better accuracy.

After setting up the pedaling angle, it will ask you to calibrate

Clip off, and calibrate. You can actually do this by putting the bike on a stand, and free spin the setup

Hope today's tips help you to restart and be ready again for the ride and season starter. Please ask me anything if you have any issues at all. 

Next: How to Do this on Vector 3S