

I've been in a dilemma. The car headlight wasn't as bright as i wanted it to be. maybe because the ride is higher and the lights did not throw as far as i wanted it to go, hence, minimising the efficiency of the whole lighting system.
Upgrading the bulbs seems to be the easiest way around. Fixing in a 90/110 wattage bulb would not only illuminate the night, but it would also blind the other drivers. It would also melt the plastic casing of most modern headlights (where the older ones are mostly made of glass) and also melt the wiring harness because of the higher heat dissipated from the updraged light bulbs.
Coincidentally, that is the trick where most so called *upgraded* bulbs which claim to imitate HID lights by churning out light temperature of almost 5000k minimum. The bluish coating on the light bulbs would allow only a certain colour of lights to go through, and hence, the whitish lights appearance. But to compensate for the thicker colour filter, the wattage of these so called *upgraded* bulbs are also doubled. Many are not aware of this and would end up a few hundred ringgit poorer when they found out they have to replace the whole wiring assemblies and worse case scenario, having their multi-face reflector headlights melted or burned.
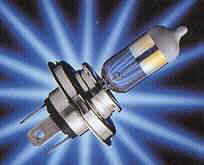
PIAA H4 Super Plasma - a 100/110W upgrade...
Lights' intensity are measured in Lux and the colour are measured in Kelvin.
Most newer HID lights (for example HID Kit & Xenon Headlights) actually emits up to 12000K colour, that is already purplish in colour and would be a nightmare to drive in rain and foggy situation(not that Malaysian roads are foggy anyway).
So, i am in the quest to get the highest lumen bulb to compensate for the ill illuminated ride at night.
I've used Osram Silverstar and Osram Cool Blue before. Silverstar worked as it claimed, but at RM70 for two, it's not exactly cheap. Cool Blue on the other hand, gives whitish hues of about 3500K (the newer ones touches 4000k) but it would meant i have to sacrifice the intensity for look.

Cool Blue effect - overated...
As safety are more important, i decided to consider Silverstar. Only thingy holding me back was the price. So, i decided to do the next best thing.

Silverstar - because the tip is silver in colour...promises 50% more light output!
Adjust the bloody headlights.
Going by the notions that headlights are ill adjusted as they leave the car factory, i whipped out the car manual and was pleasantly surprised that Hyundai did include the measurements to adjust the headlights.
They gave the distance to measure from the front of the front tyres to the wall (3000mm), the height of the light (675mm) and the distance between both headlight centre (1045mm).
Heck, in the process, i even managed to find the fog light adjustment screw for my car! Well Done! I've adjusted the foglight to act as a secondary driving light (H3 lights emit 55watt of lights, that is same as the main headlight on low beam, better get it to illuminate the road proper than the front of the car!)
Found a suitable spot where i could come back and adjust the headlight bulb.
So, i proceed to firstly place the car 3000mm from the wall. DONE.
Then i took 675mm from the ground level up and mark it in line with the car beam on the wall. This is the reference point. Marked it with marker pen. Done!
Then i took 1045mm from that 675mm point towards the left to the next headlight beam. Then i counter checked it by taking 675mm from the ground up to get the exact point. Surprisingly the headlight vertical measurement was correct. Marked it again. DONE!
But the horizontal measurement went off by 4 inches on the right headlight and 3 inches on the left headlight.

Right Beam before

Left Beam before
Took a number 6 spanner and proceed to adjust the adjustment screw behind the main headlight. Can't go wrong as there is only one for Horizontal and anohter for vertical (which i never bothered to find since i don't need to adjust it).
Took me about 10 turns to move it up an inch on both sides.
Did some finetuning to ensure that the eye of the beam sits right below the marker pen mark i did. Any higher it might not give the results i wanted, any lower would not give a good spread of light either.

Left after adjustment

Right after adjustment
Here is more comparison picture, taken at the same position inside the car (on top of the steering wheel which is steady and immobile).

Before

After
Noticeable differences between the two pictures above is the level where the lights fall on. In the before picture, the beam fell inches below the fire hose on the right and the after picture showed the beam sitting just above the fire hose box.
Little differences seen in picture but the effect when driving at night was a major improvement. The light throw further and visibility improved. Should had taken a pic of before adjustment on the road and after adjustment on the road!
Now, to actually appreciate how Silverstar would look like in total darkness, here is some pictures i've taken years back when i have this inside my Kancil.

Pic taken 100meters away, low beam, no joke.

Normal bulb's beam would stop where Silverstar is brightest
So, i'll drive along with this newly improved adjustment until i save up enough to get a pair of Silverstar!
Oh ya, last friday, my plan to pick up Ryan's MyKid card failed and i found myself going to this favourite shop of mine in Petaling Street.
This place is like some treasure trove, you can find so much bargain here it's not funny.
Here is the latest buy from that shop.

LED W5W bulb for RM2???
And here is how it looked like, before and after!

Before

After
Even Wifey's car gets a makeover!

Before

After
I must say that it looks better on Wifey's car!
And now, how am i suppsoed to be happy with the car headlights? Simple, just install any HID lights, like those being offered by HID Kit & Xenon Headlights company!
No comments:
Post a Comment